When you plan a new construction roof installation, you’re not just picking shingles and scheduling a crew. You’re coordinating framing, decking, material selection, underlayment, flashing, ventilation, and final inspection, all in the context of local code and climate. Each step affects performance, timeline, and warranty coverage. If you miss one detail early, it can shape the entire job in ways that aren’t obvious at first.
Key Takeaways
- Roof installation starts with planning, code checks, and preparing framing and decking for a flat, secure surface.
- Contractors install underlayment, flashing, and roofing materials in sequence to control moisture and protect vulnerable areas.
- Material choice depends on climate, budget, style, and required fire, wind, and warranty ratings.
- Final quality checks confirm proper fastening, alignment, ventilation, edge details, and full code compliance.
- After installation, maintain the roof with regular inspections, debris removal, and prompt repairs to protect warranty and performance.
New Construction Roof Installation Overview
A new construction roof installation starts with planning, layout, and material selection, then moves through structural preparation, underlayment, flashing, roofing application, and final inspection.
You’ll follow the new construction roof installation process step by step so your crew stays coordinated and your build stays on schedule. You verify the roof design, confirm code requirements, and match materials to the job’s slope and exposure.
Then you prepare the structure, install the underlayment to control moisture, and place flashing at vulnerable junctures.
Next, you set the roofing system with consistent alignment and secure fastening.
Finally, you inspect every section for gaps, damage, and proper coverage.
When you work this way, you’re part of a professional team that delivers a reliable roof.
Framing and Decking Before Roofing
Before you install roofing, you need to inspect the framing for plumb, level, and proper spacing so the structure can support the load.
Next, you should prepare the decking by checking for secure fastening, flat surfaces, and any damaged panels that need replacement.
Once you confirm both are sound, you can move forward with a roof deck that’s ready for underlayment and roofing materials.
Framing Inspection
Once the roof framing is up, you should inspect the structure before any decking or roofing materials go on. You’re checking that rafters, trusses, and ridge members are straight, aligned, and securely fastened.
Look for proper spacing, clean connections, and any signs of damage, twist, or excessive deflection. Verify that the roof pitch matches the plans and that load paths transfer correctly down to the supporting walls.
Confirm openings, valleys, and intersections are framed to spec so the team can keep work moving without rework. If you spot issues, raise them now with your builder or inspector.
This step helps your crew stay coordinated, protects the schedule, and keeps your roof system ready for the next phase.
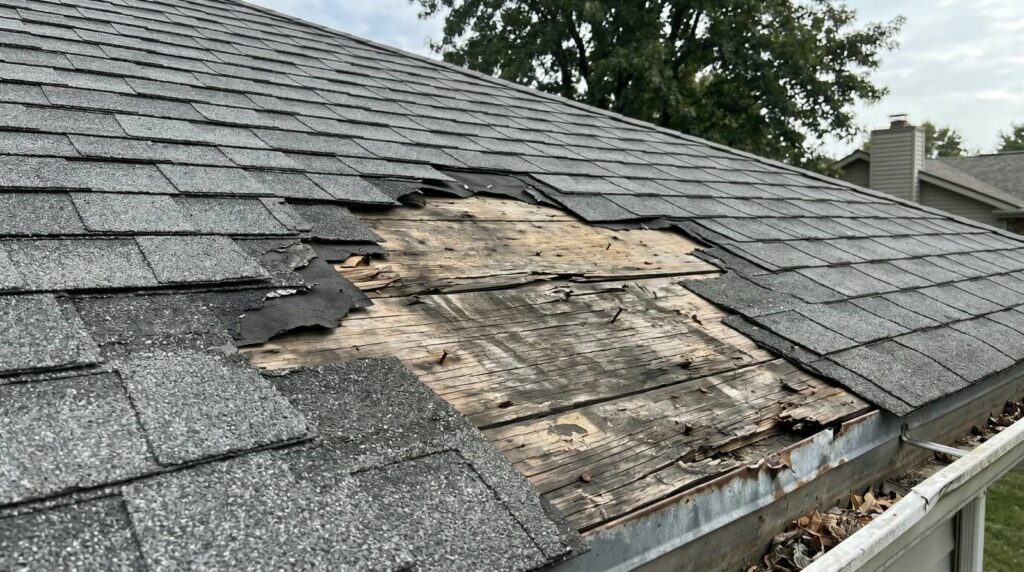
Decking Preparation
With the framing inspection complete, you can prepare the roof deck by confirming every surface is ready to receive sheathing. Check that rafters and trusses are straight, securely fastened, and spaced to plan. Remove debris, protruding nails, and damaged lumber so the deck sits flat.
Verify blocking, edge support, and nailers where required, because these details help your crew work cleanly and keep the system aligned. If you find warped members or gaps, fix them before sheathing goes on.
Confirm the correct panel thickness and exposure rating match local code and your roofing material. You’re building a roof that your whole team can trust, so keep the layout organized, the materials dry, and the work area safe.
Good preparation now prevents costly corrections later.
Choosing Roofing Materials
Choosing the right roofing material starts with matching the product to your climate, roof design, budget, and local code requirements. You’ll usually choose between asphalt shingles, metal, tile, slate, or synthetic options, and each one brings different weight, durability, and maintenance demands.
In hot, sunny areas, you may want materials with strong UV resistance and good heat reflection. In snowy or windy regions, you need products rated for those loads. Check fire ratings, wind ratings, and warranty terms before you decide.
You should also compare how the material looks with your home’s style so the finished roof feels cohesive. When you make a smart choice, you’re joining a group of homeowners who value protection, performance, and long-term value.
Installing the Roof System
After you’ve selected the roofing material, the installation process starts with preparing the roof deck and laying the system components in the correct order. You’ll want your crew to verify fastener patterns, alignment, and edge lines before anything goes on.
Each course should sit flat, meet the manufacturer’s spacing, and lock into the previous layer without gaps. You’ll see the team move steadily across the roof, keeping rows straight and joints offset so the system performs as designed.
Good communication matters here; when everyone knows the plan, the work stays clean and efficient. By staying focused on fit, pressure, and sequencing, you help build a roof that feels solid, looks consistent, and supports your home the way it should.
Underlayment, Flashing, and Ventilation
Next, you’ll install the underlayment, flashing, and ventilation components to protect the roof from water intrusion and heat buildup. You’ll lay the underlayment flat, overlap seams correctly, and fasten it so it stays tight against the deck.
In valleys, at penetrations, and along edges, you’ll place flashing to direct water away from vulnerable joints. You’ll also seal connections around chimneys, vents, and skylights to reduce leak points.
Proper ventilation matters just as much. You’ll confirm intake and exhaust openings work together, so air can move through the attic and help control moisture and temperature.
When you handle these details carefully, you support the whole roof system and help your crew deliver a durable, code-ready result that fits the standard you expect.
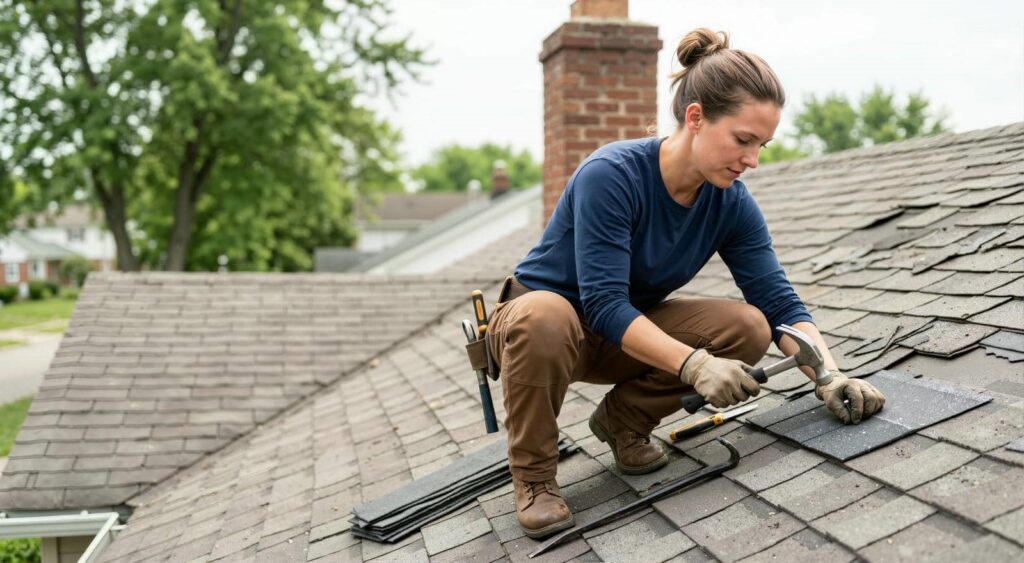
Installing Shingles, Panels, or Tiles
With the underlayment, flashing, and ventilation in place, you can begin installing the roof covering by starting at the eaves and working upward in straight, controlled courses.
You’ll align each shingle, panel, or tile to the manufacturer’s layout lines, keeping exposure even and fasteners placed in the specified nailing zone.
Work with your crew to maintain clean edges, tight overlaps, and consistent spacing around hips, valleys, vents, and penetrations.
When you’re installing panels, lock seams fully so the assembly sheds water correctly.
When you’re setting tiles, handle each piece carefully to avoid cracks and maintain the roof’s pattern.
Trim pieces where needed, then verify ridges, edges, and junctions are secure.
A well-installed roof covering gives your home a strong, finished look and helps your team deliver reliable performance.
Roof Installation Timeline and Delays
Your roof installation timeline should follow a clear sequence: planning, material delivery, weather checks, tear-off or deck prep, underlayment, flashing, ventilation, roof covering, and final inspection.
You’ll usually see a one- to three-day window for a standard home, but complex slopes, custom materials, or large roof areas can extend that.
Weather is the biggest variable; rain, high wind, or extreme heat can pause work and push each stage back.
You can keep your schedule tighter by confirming delivery dates, clearing access, and staying in contact with your builder.
If your crew finds deck damage or code issues, they’ll slow down to correct them before moving on. That’s normal, and it keeps your team on the same page.
Final Inspection and Quality Checks
Once the roofing crew finishes the last course, the final inspection checks that every component meets code and manufacturer specs. You’ll walk the roof with the superintendent or inspector and verify flashing, fasteners, underlayment, vents, and edge details. This step protects your build and confirms the crew did the job right.
Check shingle alignment, exposure, and nail placement.
Confirm valleys, penetrations, and step flashing are sealed cleanly.
Review cleanup so debris, nails, and scrap don’t stay behind.
If you spot gaps, lifted tabs, or uneven details, call them out immediately. You belong in this review process, and your questions help ensure a tight, code-ready roof.
When everything passes, you can move forward knowing the roof is set up correctly from day one.
Roof Warranty, Maintenance, and Care
A solid roof warranty gives you a clear path if materials fail or workmanship issues show up after installation, so keep the paperwork, manufacturer requirements, and contractor contact info in one place.
Read the coverage terms, note exclusions, and follow every registration deadline so you don’t void protection.
Set a maintenance routine: inspect the roof twice a year, after severe weather, and around flashing, vents, valleys, and penetrations.
Clear leaves, branches, and debris, then check gutters and downspouts for free flow.
Don’t walk on steep or wet surfaces unless you’re trained and equipped.
If you spot loose shingles, stains, or lifted sealant, call your roofer promptly.
Staying proactive helps you protect your home, preserve value, and stay part of the homeowners who catch small issues early.
Conclusion
When you finish a new roof install, you’re not just capping a house—you’re setting the crown on a fortress. If you choose the right materials, verify the framing, and insist on proper flashing, ventilation, and fastening, you help the system work as one. Once inspections pass, keep up with maintenance and follow the warranty rules. That way, your roof can stand guard through storms, seasons, and time, doing its job quietly and well.