When you replace a residential roof, you need a clear sequence to avoid costly mistakes. You’ll start by preparing the site, then schedule the residential roof replacement work and pull permits before any tear-off begins. After that, the crew removes the old roof, checks the deck for damage, and installs underlayment, flashing, shingles, and vents. The final steps are cleanup and inspection, but the details that affect durability are easy to miss.
Key Takeaways
- Prepare the property, clear access areas, move vehicles and furniture, and secure pets before work begins.
- Schedule the project, confirm permits, access details, weather contingencies, and expected completion timing.
- Remove the old roof in sections, protecting landscaping, then inspect and repair damaged decking.
- Install underlayment, flashing, shingles, and vents, followed by thorough cleanup and a quality inspection.
- Review inspections, attic conditions, warranty coverage, and finalize any issues with the contractor.
Prepare for Roof Replacement
Before the work begins, you’ll need to prepare your home and property for the roof replacement. Start the residential roof replacement process step by step by clearing driveways, patios, and walkways so crews can move safely.
Move vehicles, grills, and outdoor furniture away from the house. Inside, remove wall decor, fragile items, and anything stored in the attic that could shift from vibration. Cover belongings with tarps if dust may enter.
Trim branches that hang over the roof and secure pets in a quiet indoor space or off-site. Tell neighbors about the project so everyone stays aware. Keep children away from work zones.
These simple steps help your crew work efficiently, and they help you feel prepared, protected, and part of the process.
Schedule the Job and Pull Permits
Once your home is ready, your contractor will schedule the roof replacement and secure any required permits before work starts. You’ll get a target date, expected duration, and a clear outline of crew access, parking, and material delivery.
Ask how weather delays can shift the calendar and whether inspections are built into the plan. Permits matter because they confirm your project meets local codes and keeps you covered with the city or county.
Your contractor should handle the application, fee payment, and approval tracking, but you should verify the permit number and posting requirements. This step keeps your project organized, protects compliance, and helps everyone on your street know the work is official and coordinated.
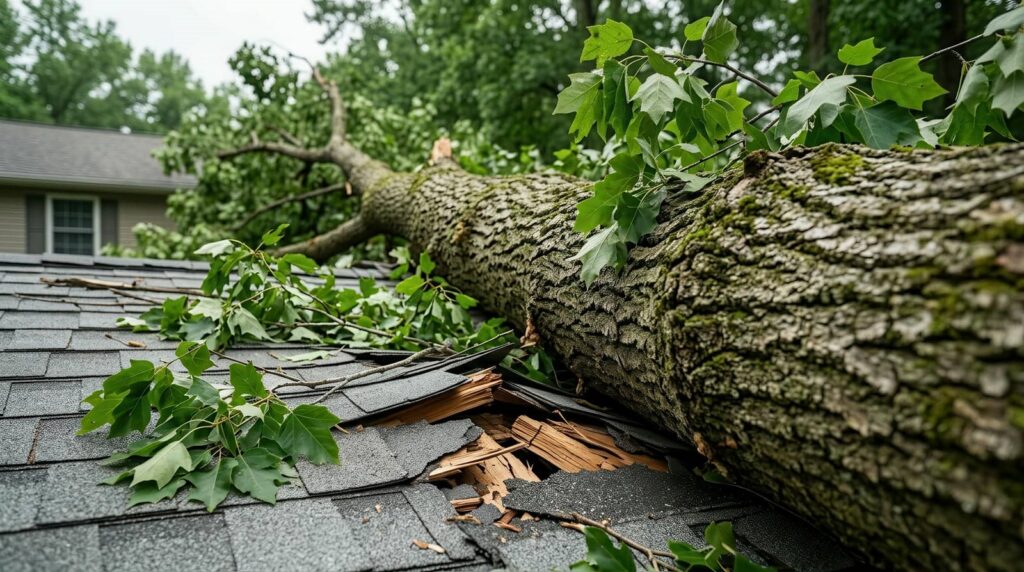
Remove the Old Roof
With permits in hand and crews on site, the roof tear-off begins by removing shingles, underlayment, flashing, and any damaged decking down to the roof deck.
You’ll hear pry bars, nail pullers, and dumpsters moving as the team strips the roof in sections to keep the workspace controlled. Crews protect gutters, landscaping, and walls with tarps and debris chutes, and they sweep frequently so your property stays manageable.
They’ll pull fasteners, stack waste for hauling, and keep edges clear to reduce slip and fall risks. Expect exposed sheathing at the end of this stage, along with a clean surface ready for the next inspection.
This is the point where your roofing team resets the system and prepares your home for a solid new installation.
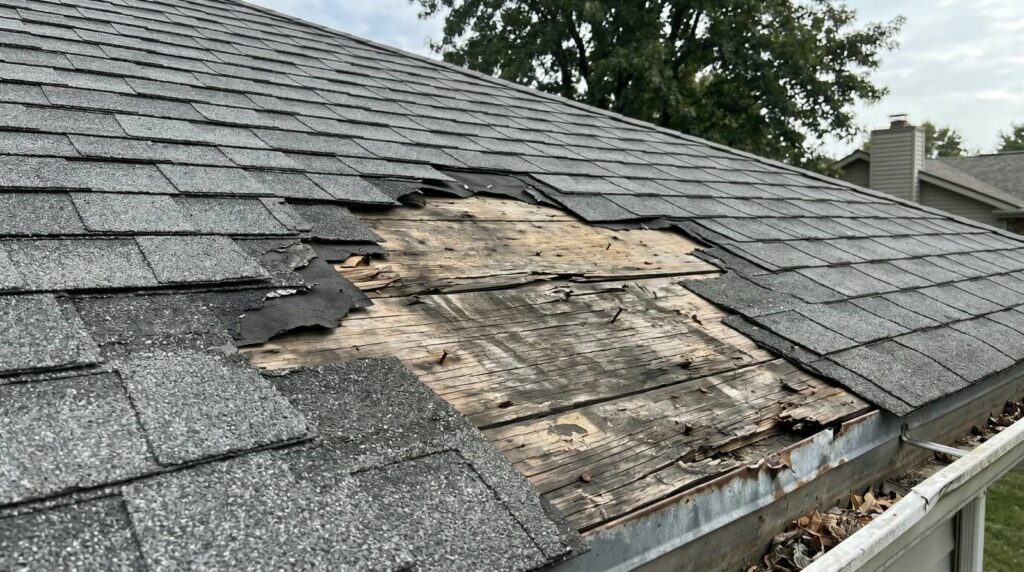
Inspect and Repair the Roof Deck
Next, you’ll inspect the roof deck for damage, soft spots, and any signs of water intrusion.
You’ll repair rot or mold right away so the surface is sound before new materials go on.
If any sections are weak or compromised, you’ll replace them to restore full structural support.
Deck Damage Assessment
Before the new shingles go on, the contractor inspects the roof deck for rot, soft spots, water damage, and loose or broken sheathing.
You’ll usually see them walk each slope, press on the panels, and mark any areas that flex or feel uneven. They check fastener hold, panel thickness, and spacing so the new roof has a solid base.
If the decking has minor damage, they replace only the affected sections and match the new material to the existing deck. This step protects your warranty, supports proper nailing, and helps the shingles lie flat.
When you stay involved, you’ll know the roof team is building on a dependable surface that meets the job specs.
Rot and Mold Repair
If the deck inspection turns up rot or mold, the crew removes the damaged sections and repairs the roof structure before any new underlayment goes down. You’ll want the area dry, clean, and ready so moisture doesn’t keep spreading under the new system.
The team traces the source, checks nearby sheathing, and treats affected surfaces so the repair holds. You stay in the loop on what was found and why it needed correction.
- Verify all soft, stained, or delaminated decking is documented.
- Confirm the framing and adjacent panels are sound and properly fastened.
- Make sure the deck passes a final moisture check before coverage.
This step protects your new roof, keeps your home’s envelope tight, and helps you feel confident the job’s being done right.
Replace Weak Sections
With the damaged areas already identified, the crew removes any weak, split, or compromised deck sections and replaces them with new sheathing that matches the existing thickness and layout.
You’ll see them check fastening patterns, panel spans, and edge support so the roof deck stays flat and stable. They cut back to solid framing, secure each replacement panel with proper nails or screws, and maintain the correct gaps for expansion.
This step restores the base your new roofing system needs to perform as designed. If you’re on site, you’ll notice the work moving in sections so the structure stays protected.
When the deck is sound again, the team can continue with confidence, and you can feel good knowing your roof is being rebuilt the right way.
Install Underlayment and Flashing
Next, the crew installs the underlayment to create a secondary moisture barrier over the roof deck. You’ll see the material rolled out flat, overlapped correctly, and fastened so it stays smooth and secure.
At valleys, edges, and penetrations, flashing goes in next to direct water away from vulnerable joints. This stage protects the structure before finish materials arrive, and it’s where careful detail really pays off.
You’re part of a process that values precision, so ask questions if anything looks uneven or exposed.
- Confirm all seams overlap in the correct direction.
- Check flashing fit around walls, chimneys, and openings.
- Verify fasteners don’t create wrinkles or gaps.
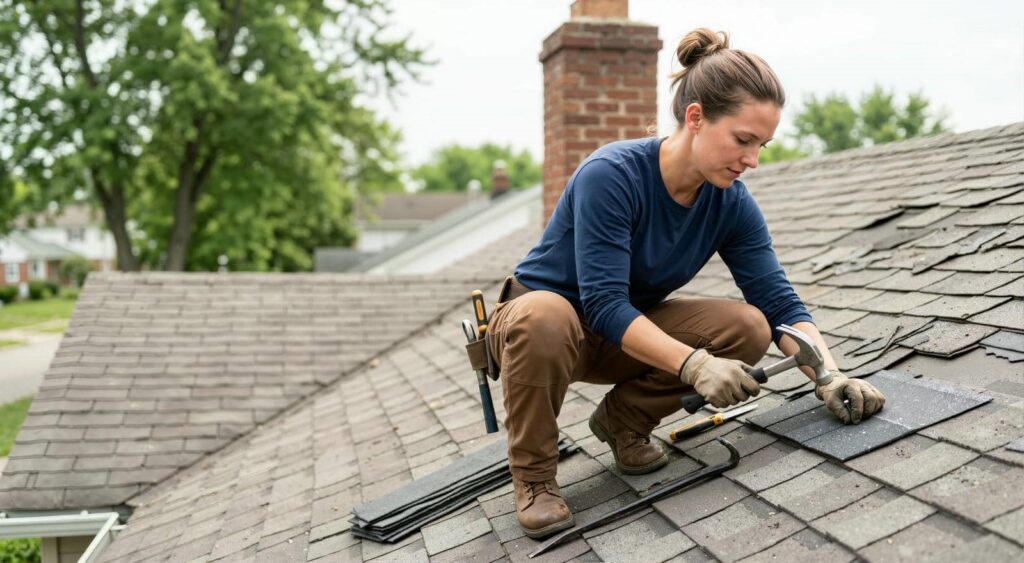
Replace Shingles and Roof Vents
Shingles and roof vents go on after the underlayment and flashing are secure, restoring the roof’s weather barrier and ventilation system.
You’ll start at the eaves and work upward, keeping each course straight and properly overlapped. Nail each shingle in the manufacturer’s pattern so wind resistance stays consistent and the roof stays eligible for warranty coverage.
Around valleys, hips, and ridges, you’ll trim shingles for clean fit and tight coverage. Next, you’ll replace damaged vents, reset pipe boots, and install ridge vents where specified.
You’ll seal fasteners and maintain balanced intake and exhaust airflow, which helps control heat and moisture in your attic. When you work with this sequence, you’re helping your roof perform as a team member in your home.
Clean Up the Job Site
Once the shingles, vents, and ridge components are in place, you’ll shift to cleanup so the roof replacement wraps up safely and cleanly. You and the crew should collect nails, shingle scraps, underlayment, and packaging from the roof, gutters, and yard.
Use magnetic sweepers on the ground and driveway to catch hidden fasteners that could damage tires or injure feet. Stack reusable materials in the designated area and load debris into the trailer or dumpster as you go. Keep walkways clear so everyone can move without tripping.
- Check landscaping for dropped debris
- Clear gutters and downspouts of loose granules
- Remove tools, ladders, and safety gear
A thorough cleanup shows respect for your home and helps your roofing team finish strong.
Inspect the Finished Roof
With cleanup complete, you should inspect the finished roof to confirm the installation meets expectations.
Walk the perimeter and check that shingles, panels, or tiles sit flat, align properly, and show no damage.
Look closely at ridge caps, flashing, vents, pipe boots, valleys, and drip edges for tight seals and clean edges.
From the ground, confirm straight roof lines and consistent color patterns.
If safe access is available, verify that nails aren’t exposed and that debris is gone from gutters and downspouts.
Inside, check the attic for daylight, damp spots, or ventilation issues.
Compare the result with your contract and warranty documents.
If you spot anything off, report it right away so your crew can make it right and you can feel confident in the finished system.
Review
When you finish a residential roof replacement, you’re not just installing shingles—you’re setting a shield over everything below. The new roof symbolizes your home’s renewed strength, and each layer, from underlayment to flashing, works like a lock against leaks and weather. If you’ve followed the process step by step, you’ve built something solid, clean, and compliant. Now’s the time to inspect the final result and confirm it’s ready to protect your home for years.