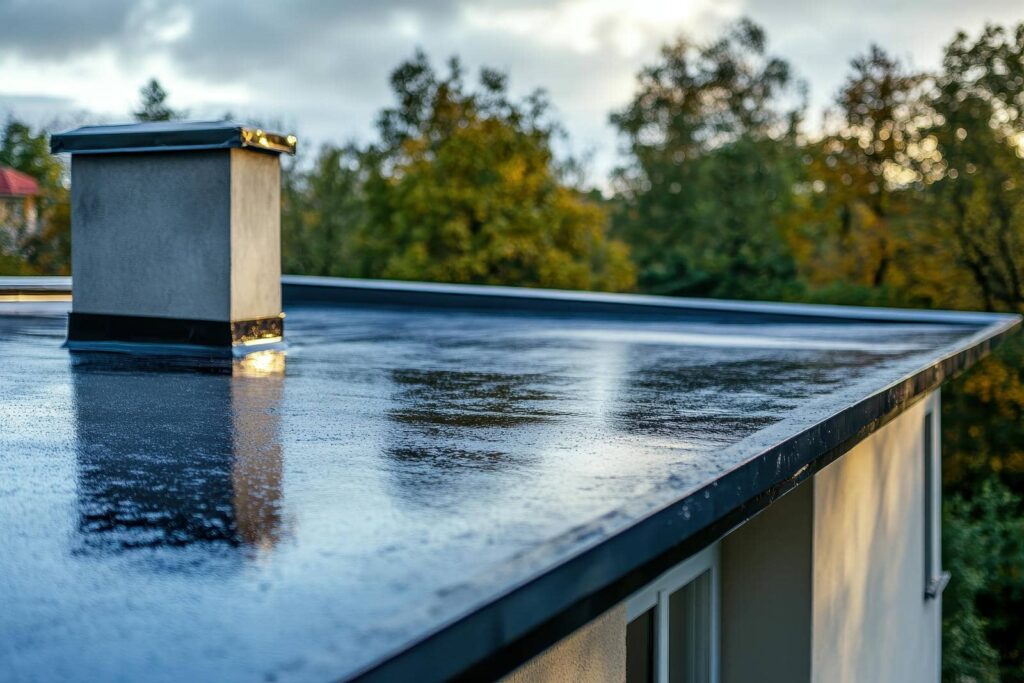
A flat roof can be like a sponge, soaking up water until it inevitably leaks. Identifying the source of that leak is essential, as the longer you wait, the more extensive the damage can become. It’s not just about patching up holes; it’s about applying the right techniques to ensure a lasting repair. Let’s explore the most effective methods that can save you time, money, and headaches in the long run.
Key Takeaways
- Inspect the roof thoroughly for leaks around plumbing fixtures, skylights, and ventilation systems using moisture testing techniques.
- Clean the roof surface to remove debris, ensuring proper drainage and effective inspection of potential damage.
- Apply roofing cement generously over the leak area, ensuring it adheres well to the existing roofing material.
- Use patch kits for minor leaks, ensuring compatibility with roofing material and following manufacturer instructions for effective curing.
- Consider liquid rubber for seamless waterproofing, providing flexibility and excellent UV resistance for long-lasting repairs.
Identifying the Source of the Leak
When you notice water stains or damp spots on your ceiling, it’s essential to identify the source of the leak promptly. Start by inspecting the areas around plumbing fixtures, skylights, and ventilation systems, as these are common leak entry points.
Utilizing moisture testing techniques, you can determine if water has infiltrated your flat roof structure. A moisture meter can help quantify the level of dampness, guiding your next steps.
To effectively detect leaks, you’ll want to examine both the interior and exterior of your roof. Look for blisters, cracks, or pooling water on the surface.
Don’t overlook potential hidden issues such as deteriorated insulation or damaged membranes. If you’re unable to pinpoint the source, consider enlisting a professional. Their expertise in detecting leaks can save you time and resources, ensuring a thorough assessment and subsequent repair of your flat roof.
Cleaning the Roof Surface
Before you can effectively repair a flat roof leak, you need to clean the roof surface thoroughly.
Start by removing all debris, as this can obstruct your inspection for damage and hinder proper drainage.
Once cleared, assess both the roof’s condition and the drainage system to ensure peak performance.
Remove Debris Thoroughly
Start by clearing the roof surface of any debris, as this is crucial for an effective leak repair.
Thorough debris removal ensures you can fully assess the condition of the roofing materials without obstruction. Use a broom or blower to eliminate leaves, twigs, and dirt, which can trap moisture and lead to further damage.
Pay special attention to areas around drains and seams, as blockages here can exacerbate leaks. Maintaining roof cleanliness aids in immediate repairs and prolongs the life of your roofing system.
Once the surface is clean, you’ll have a better foundation for identifying any potential damage during your inspection, setting the stage for a successful repair process.
Inspect for Damage
After you’ve cleared the roof surface of debris, it’s essential to inspect for damage to ensure a thorough leak repair.
Begin with a detailed visual inspection, looking for common damage indicators such as cracks, blisters, and punctures in the roofing material. Pay close attention to seams and joints, as these areas are often more susceptible to wear.
Check for any pooling water, which can exacerbate existing issues. Utilize a flashlight to reveal hidden damage, especially in shaded areas.
Document your findings meticulously, noting any potential weak spots that require immediate attention.
Assess Drainage System
To ensure effective leak repairs, evaluating the drainage system is essential, as clogged gutters or drains can lead to water accumulation on the roof surface.
Start with a thorough drainage evaluation to identify blockages or debris that may hinder water flow. Remove any leaves, dirt, or other materials obstructing the gutters and drains to ensure proper water drainage.
Next, assess the slope of the roof; it should facilitate water movement toward the drainage points. If you find persistent issues, consider system optimization strategies, such as adding additional drains or adjusting the roof’s slope.
Applying Roofing Cement
Applying roofing cement effectively seals leaks and provides a durable barrier against water intrusion, making it an essential step in flat roof leak repair.
To begin, verify the surface is clean and dry; remove debris, dirt, and any loose material that could hinder adhesion.
Next, choose a high-quality roofing cement specifically designed for flat roofs.
For peak cement application, use a trowel or putty knife to spread a generous layer over the leak area, extending beyond the edges by at least 3 inches for a complete seal.
Be sure to apply pressure to embed the cement into the existing roofing material.
For best results, consider incorporating roofing techniques like reinforcing the cement with fiberglass mesh for added strength.
Finally, allow the cement to cure according to the manufacturer’s instructions, ensuring long-lasting protection against future leaks.
Using Patch Kits for Minor Leaks
When addressing minor leaks in flat roofs, selecting the right patch kit is essential for effective repair.
You’ll want to follow specific application process steps to ensure a secure bond between the patch and the roofing material.
Additionally, implementing long-term maintenance tips can help prevent future leaks and extend the lifespan of your flat roof.
Selecting the Right Kit
Choosing the right patch kit for minor flat roof leaks can considerably enhance your repair process and prolong the life of your roof.
When selecting a kit, focus on kit features such as adhesive strength, flexibility, and weather resistance. These attributes are essential for ensuring durability and effectiveness in various conditions.
Additionally, check for kit compatibility with your roofing material—whether it’s EPDM, TPO, or modified bitumen. A compatible kit will adhere better and provide a seamless repair.
Make sure to read reviews or seek recommendations to find a reputable product that meets your needs. Investing time in selecting the appropriate patch kit will save you money in the long run and foster a sense of community among fellow homeowners.
Application Process Steps
To effectively repair minor flat roof leaks with patch kits, start by gathering your materials and ensuring all surfaces are clean and dry.
First, identify the leak’s location and mark it. Next, apply the patch kit’s primer if included, using a roller or brush for even coverage.
Once the primer has dried, use the spray application method for the patch material, ensuring you cover the leak thoroughly. Smooth out any bubbles or wrinkles to ensure a solid bond.
Follow the manufacturer’s instructions regarding curing time before exposing the patched area to moisture.
Long-Term Maintenance Tips
Although patch kits provide a quick solution for minor flat roof leaks, implementing long-term maintenance strategies is vital for sustaining your roof’s integrity.
To prevent future leaks, adopt preventive measures like regularly inspecting seams, flashing, and drain areas. Seasonal checks are important; make it a habit to assess your roof after heavy rain or snow.
Remove debris and ensure proper drainage to avoid water pooling, which can lead to leaks. Additionally, consider applying a protective coating every few years to enhance durability.
Keeping a maintenance log can also help you track repairs and identify patterns over time. By staying proactive, you’ll strengthen your roof’s resilience and prolong its lifespan, fostering a sense of community among fellow homeowners.
Installing a Roof Membrane
Installing a roof membrane is a critical step in ensuring the longevity and integrity of a flat roof.
You’ll first want to choose the right membrane type based on your specific needs and climate. Common options include TPO, EPDM, and PVC, each offering unique benefits, such as UV resistance and flexibility.
Once you’ve selected the membrane, focus on proper installation techniques.
Begin by preparing the surface to verify it’s clean and free of debris. Lay the membrane evenly, ensuring it overlaps with adjacent sheets to prevent leaks. Utilize mechanical fasteners or adhesive as recommended for your chosen membrane type, following the manufacturer’s guidelines closely.
Finally, inspect the seams and edges, as these are critical areas where leaks can develop.
Taking the time to install your roof membrane correctly will provide a robust barrier against water infiltration, ultimately safeguarding your investment.
Sealing Cracks With Liquid Rubber
When sealing cracks in your flat roof, liquid rubber offers a reliable solution that ensures a durable, waterproof barrier.
You’ll start by preparing the surface, applying the liquid rubber evenly, and allowing it to cure properly for maximum adhesion.
The benefits of using liquid rubber include its flexibility, resistance to UV rays, and long-lasting protection against leaks.
Application Process Overview
Sealing cracks with liquid rubber is a straightforward yet effective method for addressing flat roof leaks.
To begin, verify the surface is clean and dry, removing any debris or loose materials. Next, select high-quality liquid rubber as your repair material.
Using a caulking gun or brush, apply the liquid rubber directly into the cracks, employing precise application techniques to ensure full coverage. It’s essential to work the material into the crack, ensuring a seamless bond with the existing roofing.
Allow sufficient drying time as per the manufacturer’s instructions, typically 24 hours, before exposing it to water.
This thorough application process seals the cracks and enhances the durability of your flat roof, promoting long-term protection.
Benefits of Liquid Rubber
Liquid rubber offers several advantages for sealing cracks in flat roofs, making it a preferred choice among roofing professionals.
This versatile material creates a seamless waterproof barrier that effectively prevents water infiltration, prolonging the lifespan of your roof. Its flexibility allows it to expand and contract with temperature fluctuations, ensuring durability in varying weather conditions.
Additionally, liquid rubber adheres to a wide range of substrates, promoting strong bonds and minimizing the risk of future leaks. Application is straightforward, enabling you to tackle repairs quickly and efficiently.
With excellent UV resistance, it protects against sun damage, further enhancing your roof’s performance. Choosing liquid rubber means investing in reliable, long-lasting protection for your flat roof.
Reinforcing Weak Areas With Fabric
Sometimes, even the most durable flat roofs develop weak spots that can lead to leaks and further damage. To address these vulnerabilities, you can reinforce the affected areas using specialized fabric types designed for roofing applications. Options like fiberglass, polyester, or even woven fabrics provide excellent durability and flexibility.
Start by cleaning the surface thoroughly to ensure proper adhesion. Apply a suitable primer, then cut the fabric to size, allowing for an overlap of at least six inches on all sides. Using an appropriate adhesive or roofing cement, embed the fabric into the primer layer. Make sure to smooth out any air bubbles, as these can compromise the repair.
Finally, seal the fabric with another layer of roofing material or liquid rubber to create a waterproof barrier. By employing these application techniques, you’ll enhance your roof’s integrity and extend its lifespan, fostering a sense of community and pride in your home.
Inspecting and Repairing Flashing
While you may have reinforced weak areas of your flat roof, it’s vital to inspect and repair the flashing to ensure a thorough leak prevention strategy.
Flashing acts as a barrier against water infiltration, and understanding the various flashing types and proper installation techniques is essential.
Here’s how to make sure your flashing is in top condition:
Visual Inspection: Check for cracks, gaps, or signs of weathering around the flashing.
Sealant Integrity: Assess the condition of sealants; reapply if they’re deteriorating.
Flashing Alignment: Confirm that flashing is properly aligned with the roof surface and adjacent structures.
Material Suitability: Verify that the flashing material is appropriate for your roof type, considering factors like durability and flexibility.
Utilizing TPO or EPDM for Repair
When addressing flat roof leaks, utilizing TPO (Thermoplastic Olefin) or EPDM (Ethylene Propylene Diene Monomer) membranes can markedly enhance your repair efforts.
TPO advantages include its lightweight nature and reflective surface, which can help reduce energy costs while providing excellent resistance to UV rays. This makes TPO an efficient choice for roofs exposed to harsh sunlight.
On the other hand, EPDM durability is unmatched, offering a long lifespan with impressive flexibility and resistance to extreme temperatures.
When sealing leaks, both materials can be easily adhered using specialized adhesives or mechanical fasteners, ensuring a tight fit that prevents future issues.
Regular Maintenance and Inspections
After selecting TPO or EPDM for leak repairs, maintaining your flat roof becomes essential to ascertain its longevity and performance.
Regular maintenance and inspections prevent costly repairs and also ensure your roofing system operates effectively.
Implement these preventive measures:
Conduct Routine Checks: Inspect your roof at least twice a year for signs of wear, damage, or debris accumulation.
Clear Drains and Gutters: Remove leaves and other blockages to prevent water pooling, which can lead to leaks.
Examine Seams and Flashings: Look for cracks or separation in seams, as these are common leak points.
Schedule Professional Inspections: Engage a roofing expert annually to assess your roof’s condition and recommend necessary repairs.
Frequently Asked Questions
How Can I Prevent Future Flat Roof Leaks?
To prevent future flat roof leaks, implement regular roof maintenance and adopt preventative measures, like clearing debris, checking for cracks, and ensuring proper drainage. These actions can greatly extend your roof’s lifespan and enhance its durability.
What Tools Do I Need for Flat Roof Repairs?
You’ll need essential tools like a utility knife, trowel, and roller for applying flat roof materials. Don’t forget to wear safety gear—gloves, goggles, and a harness—to ensure your repair process is secure and efficient.
How Often Should I Inspect My Flat Roof?
You should inspect your flat roof at least twice a year, ideally in spring and fall. Regular flat roof maintenance ensures early detection of issues, reducing costly repairs and prolonging the roof’s lifespan.
Can I Repair My Flat Roof in Winter?
Yes, you can repair your flat roof in winter, but cold weather complicates the process. Make sure materials are suited for winter roofing and follow proper techniques to prevent future issues. Timing is essential for success.
When Should I Hire a Professional for Repairs?
You should hire a professional when you notice significant repair indicators, like persistent leaks or structural issues. Their expertise ensures proper solutions, preventing further damage and providing long-term benefits to your flat roof’s integrity.
Wrap-Up
Addressing flat roof leaks requires a systematic approach to ensure long-lasting repairs. By identifying the leak source, cleaning the surface, and applying appropriate materials like roofing cement or TPO, you can effectively safeguard your roof. Regular maintenance and inspections can further extend its lifespan, helping you avoid costly repairs down the line. Stay proactive and keep your flat roof in top condition!