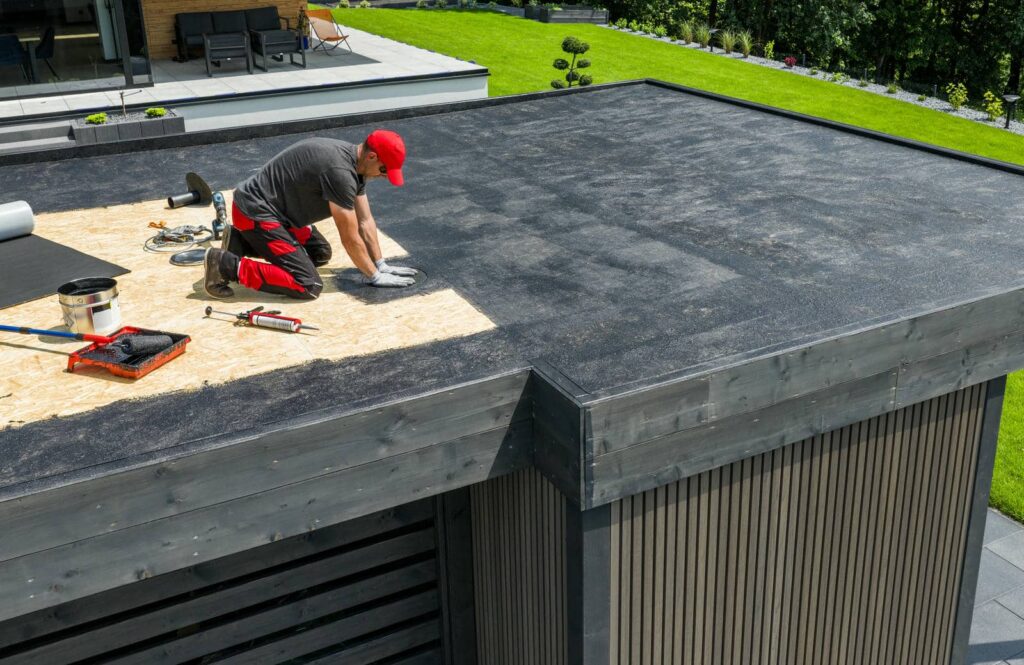
Your flat roof is like a shield, protecting your structure from the elements, but even the best shields can develop cracks. To ensure it remains watertight, you’ll need to conduct a meticulous roof inspection. From checking for visible damage to monitoring drainage systems, each step is essential. What specific signs should you look for, and how can you prevent future leaks? Let’s explore the top ten inspection tips that can help maintain your roof’s integrity.
Key Takeaways
- Conduct visual inspections for cracks, blisters, and pooling water to identify potential leak sources on the roof membrane.
- Regularly check flashing and seams for gaps or rust that could compromise waterproofing and lead to leaks.
- Monitor drainage systems for ponding water, ensuring all gutters and drains are clear of debris to prevent water accumulation.
- Inspect surrounding structures and vegetation that may impede drainage or cause moisture retention against the roof.
- Look for signs of mold or discoloration, indicating moisture issues, and document findings for future reference and timely repairs.
Inspect for Visible Damage
When inspecting a flat roof, the first step is to carefully examine it for visible damage. Conduct an extensive visual inspection, focusing on areas that commonly experience wear and tear. Look for cracks, blisters, or pooling water, as these can indicate underlying issues.
Pay attention to the roof’s surface texture; any changes may signal potential problems. During your damage evaluation, note any areas where the roofing material appears discolored or sagging, as these could lead to leaks if not addressed promptly.
Utilize a notepad or digital device to record findings, ensuring you capture every detail. It’s also wise to check for debris accumulation, which can impede proper drainage and exacerbate damage.
Check Flashing and Seams
When inspecting your flat roof, focus on the flashing and seams for any signs of damage or wear.
Look for cracks, gaps, or rust that could compromise the roof’s integrity.
Confirm that all seams are properly sealed to prevent water infiltration and maximize the roof’s lifespan.
Inspect for Damage
A thorough inspection of your flat roof’s flashing and seams is essential for identifying potential damage.
Start by checking the flashing, which often experiences wear due to weather exposure. Look for cracks, gaps, or signs of rust that could indicate vulnerabilities.
Next, examine the seams where the roofing materials meet; these areas are critical for leak detection. Confirm there aren’t any loose or peeling sections that could compromise your roof’s integrity.
Integrating this step into your maintenance schedule can help you catch issues early, preventing costly repairs down the line.
Ensure Proper Sealing
After inspecting for damage, the next step is to ensure proper sealing around the flashing and seams.
Begin by checking for gaps or cracks where water might infiltrate. Use effective sealing techniques, such as applying a high-quality sealant specifically designed for flat roofs.
Ascertain that the flashing is tightly secured and free from rust or deterioration. Replace any compromised flashing with durable, weatherproof materials to enhance protection against leaks.
Pay particular attention to seams, as they’re common leak points; use a seam tape or sealant to reinforce these areas.
Regularly inspect and maintain these seals to uphold the integrity of your flat roof, assuring a reliable barrier against the elements for your peace of mind.
Look for Ponding Water
When inspecting your flat roof, always look for areas with ponding water, as this can indicate drainage issues.
Monitor any water accumulation, paying attention to how long it remains after rainfall.
Identifying these problems early can prevent costly repairs and extend the lifespan of your roof.
Identify Drainage Issues
While inspecting a flat roof, it is crucial to identify drainage issues, particularly by looking for ponding water. Proper water flow is critical for maintaining your drainage system’s integrity. Standing water can lead to leaks, structural damage, and costly repairs.
Here’s a quick checklist to help you assess drainage issues:
| Observation | Action |
|---|---|
| Ponding water present | Assess drainage points |
| Clogged drains | Clean and clear obstructions |
| Improper slope | Adjust roof pitch |
| Visible wear or tears | Schedule repairs |
Monitor Water Accumulation
Monitoring water accumulation on a flat roof is essential for preventing long-term damage. Check your roof regularly for signs of water pooling, especially after heavy rains.
Ponding water can lead to structural issues and promote mold growth, which affects both the integrity of your roof and your indoor air quality. Be proactive in identifying areas where water collects and explore effective drainage solutions.
Ensure that gutters and downspouts are clear and functioning properly, directing water away from the roof. If you notice persistent pooling, consider consulting a roofing professional for an assessment.
Examine Roof Drains and Gutters
Inspecting roof drains and gutters is vital for maintaining the integrity of your flat roof. Proper drainage maintenance prevents leaks and water damage.
Start by checking the following:
- Clear Debris: Remove leaves, dirt, and other obstructions from gutters and drains. Clogged gutters can lead to water pooling, increasing the risk of leaks.
- Inspect for Damage: Look for cracks or rust in the gutters and around the drains. Any damage can compromise the drainage system, so it’s important to address these issues promptly.
- Test Water Flow: Pour water into the drains to verify it flows freely. Slow drainage indicates blockages or structural problems that need immediate attention.
Assess the Condition of Roof Membrane
When evaluating the roof membrane, start by inspecting for cracks that could lead to leaks.
Next, check for blisters, as these can indicate trapped moisture beneath the surface.
Finally, look for punctures that might compromise the membrane’s integrity, ensuring you address any issues promptly.
Inspect for Cracks
As you assess the condition of the roof membrane, look closely for any cracks that may indicate underlying issues.
Identifying crack types is essential for determining the appropriate repair methods. Here’s how to systematically inspect for cracks:
- Surface Cracks: These are often shallow and can usually be repaired with sealants.
- Structural Cracks: These deeper cracks may require patching and additional reinforcement to prevent further damage.
- Thermal Cracks: Resulting from temperature fluctuations, these may need specialized materials for effective sealing.
Check for Blisters
Blisters on a flat roof can signal significant underlying issues with the roof membrane, so it’s vital to identify them during your inspection.
Start by examining the surface closely for any signs of blister formation. These raised areas can indicate moisture trapped beneath the membrane, leading to deterioration over time.
Use your fingers to gently press on the blisters; if they feel soft or waterlogged, it’s a clear sign that repair is necessary. Document the locations and sizes of the blisters for reference.
When it comes to blister repair, addressing the root cause is critical, as merely patching the surface won’t resolve underlying problems. Engaging a professional may be wise to ensure a thorough and effective repair.
Look for Punctures
Inspecting the roof membrane for punctures is essential, since even small breaches can lead to significant water damage over time.
To effectively assess puncture locations, follow these steps:
- Visual Inspection: Carefully scan the entire roof surface for any visible tears or holes.
- Touch Test: Run your hand over the membrane to feel for any inconsistencies or soft spots that could indicate hidden punctures.
- Water Test: If safe, spray water over the area and watch for leaks indoors, confirming potential puncture sites.
Once you’ve identified puncture locations, consider appropriate repair techniques, such as using patches or sealants, to prevent further damage.
Being thorough in your inspection protects your roof and fosters a sense of community by ensuring you’re taking care of a shared space.
Inspect for Cracks and Blisters
A thorough check for cracks and blisters is essential to maintaining the integrity of your flat roof. Cracks can lead to significant leaks, while blisters often indicate trapped moisture. To effectively inspect, look for visible signs of damage and understand the potential causes.
| Crack Prevention | Blister Causes |
|---|---|
| Regular maintenance | High humidity |
| Proper installation | Poor drainage |
| Quality materials | Temperature changes |
When you spot cracks, it’s key to address them promptly with suitable sealants. For blisters, assess the surrounding conditions; they often form due to moisture or heat buildup. By understanding these elements, you can take proactive measures to prevent further issues. Regular inspections enhance your roof’s lifespan and foster a sense of community responsibility among homeowners, as maintaining shared spaces benefits everyone.
Evaluate Surrounding Structures
When evaluating your flat roof, it’s important to also assess the surrounding structures. These elements can notably impact your roof’s integrity and help identify potential leak sources.
Here are three key aspects to take into account:
- Nearby Trees: Inspect for overhanging branches that may scrape against your roof or drop debris. These can lead to wear and tear, increasing leak risks.
- Surrounding Vegetation: Assess any plants or shrubs that might retain moisture against your roof. Excess moisture can create an environment conducive to leaks.
- Drainage Systems: Check gutters and downspouts connected to your flat roof. Verify they’re clear of debris, as blockages can lead to water pooling and eventual leakage.
Check for Signs of Mold or Mildew
Mold and mildew can pose serious threats to your flat roof’s longevity, so you should be vigilant in identifying any signs during your inspection.
Start by looking for dark spots, discoloration, or a musty smell, which are clear indicators of mold growth. Check areas with poor drainage or where moisture collects, as these are prime spots for mildew development.
Implementing mold prevention strategies is essential; ensure your roof has proper ventilation and drainage to reduce moisture buildup.
If you find mold or mildew, act quickly with an appropriate mildew treatment. Use a mixture of water and bleach for small areas, but for significant infestations, consider consulting a professional.
Regular inspections and maintenance will help you catch issues early and foster a sense of community among homeowners who prioritize their roofs’ health.
Your diligence will pay off in the long run.
Monitor for Temperature Changes
Monitoring temperature changes on your flat roof can reveal critical insights into its condition and performance. By observing temperature variations, you can identify potential issues before they escalate.
Utilizing thermal imaging technology is an effective way to detect these discrepancies. Here are three key steps to evaluate:
- Regular Inspections: Schedule routine checks to monitor temperature fluctuations throughout the year. This helps detect any abnormal heat patterns that may indicate underlying problems.
- Use Thermal Imaging: Invest in thermal imaging equipment or hire a professional to assess your roof’s surface temperature. This method highlights areas of heat loss, moisture intrusion, or insulation failures.
- Document Changes: Keep detailed records of temperature readings over time. This documentation can provide valuable information for future inspections and maintenance planning.
Document Findings and Schedule Repairs
After you’ve monitored temperature changes on your flat roof, it’s crucial to document your findings and schedule necessary repairs. This documentation process is important for tracking issues over time and ensuring that repairs are timely and effective.
| Issue Identified | Action Required |
|---|---|
| Cracks or Blisters | Immediate repair needed |
| Ponding Water | Drainage improvement |
| Membrane Damage | Full replacement advised |
Frequently Asked Questions
How Often Should I Inspect My Flat Roof for Leaks?
You should inspect your flat roof at least twice a year. Regular inspection and flat roof maintenance are essential for leak prevention. This proactive approach helps ensure your roof remains in good condition and extends its lifespan.
Can I Inspect My Flat Roof Myself?
Yes, you can inspect your flat roof yourself. Like a detective solving a mystery, methodically check for signs of wear. Regular DIY inspections are essential for effective flat roof maintenance, ensuring your home stays safe and sound.
What Tools Do I Need for a Roof Inspection?
For a thorough roof inspection, you’ll need essential equipment like a sturdy ladder, a safety harness, a flashlight, a moisture meter, and a notepad for observations. These roof inspection tools will help you identify potential issues effectively.
When Should I Hire a Professional for Roof Inspections?
You should hire a professional when you notice signs of damage, like water stains or cracks. If you’re unsure about the extent of the issues, getting expert help ensures your roof’s integrity and longevity.
Are There Seasonal Considerations for Roof Inspections?
Aren’t seasonal weather changes essential for roof maintenance? Inspect your flat roof before winter and after heavy storms to catch potential issues early. This proactive approach ensures your roof stays in top shape year-round.
Recap
You should inspect for visible damage, check flashing and seams, and look for ponding water. You should examine roof drains and gutters, assess the roof membrane, and evaluate surrounding structures. You should also check for signs of mold or mildew, monitor temperature changes, and document your findings. By following these steps, you secure the integrity of your flat roof, protect your investment, and prevent costly repairs down the line.