While the beauty of spring can be deceptive, with blooming flowers masking potential roof issues, it’s vital to prioritize a thorough roof inspection. You need to examine areas that are often overlooked, such as flashing, shingles, and gutters. Identifying leaks early can prevent costly repairs down the line. But what specific signs should you look for, and how can you effectively address any issues you find?
Key Takeaways
- Inspect flashing around chimneys, vents, and skylights for damage, as these are common leak entry points.
- Look for missing, cracked, or curled shingles that may expose the roof to water intrusion.
- Clear gutters and downspouts of debris to prevent water pooling and overflow during spring rains.
- Check roof valleys for debris accumulation that can trap water and lead to leaks.
- Use a moisture meter in the attic to detect hidden leaks and moisture levels.
Importance of Regular Roof Inspections
While many homeowners overlook their roofs until a problem arises, regular roof inspections are essential for maintaining the integrity of your home. Establishing a roof maintenance routine helps identify potential issues before they escalate into costly repairs.
Experts recommend conducting inspections at least twice a year—once in spring and once in fall—to assess the condition of shingles, flashing, and gutters.
During these inspections, you’ll want to check for signs of wear, such as loose shingles, granule loss, or rust on metal components. By adhering to this inspection frequency, you can ensure that small problems are addressed promptly, ultimately extending your roof’s lifespan.
Additionally, regular inspections can enhance your home’s energy efficiency, reducing potential heating and cooling costs. By prioritizing roof maintenance, you protect your investment and create a safer, more comfortable living environment for you and your family.
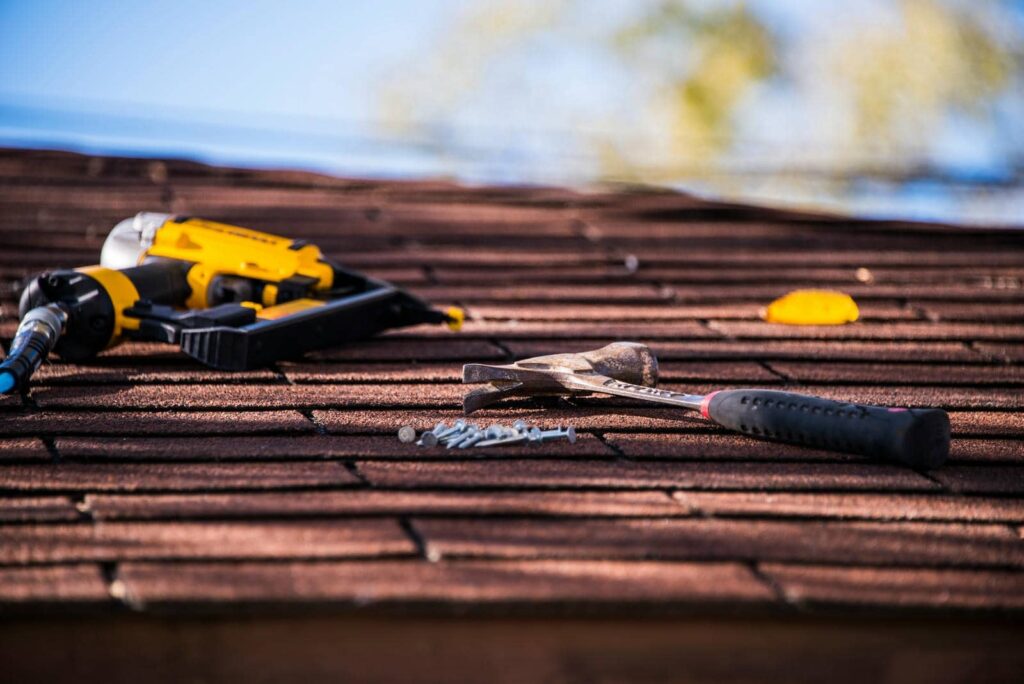
Tools Needed for a Roof Inspection
To conduct a thorough roof inspection, you’ll need specific tools to assess the condition effectively.
Essential inspection tools include a ladder, flashlight, and moisture meter, while safety equipment like harnesses and non-slip shoes is vital for your protection.
Ensuring you have the right gear will help you identify potential issues before they escalate.
Essential Inspection Tools
When conducting a thorough roof inspection, having the right tools at your disposal is essential for identifying potential issues effectively.
You’ll want to gather specific equipment that enhances your inspection techniques and helps you assess roofing materials accurately. Here are three essential tools to take into account:
Flashlight: A bright, focused light helps you spot leaks and damage in dark areas, such as under eaves or inside attics.
Moisture Meter: This tool measures humidity levels, allowing you to detect hidden leaks and moisture within roofing materials.
Ladder: A sturdy ladder enables safe access to your roof, ensuring you can inspect all areas thoroughly.
Equipped with these tools, you’ll feel confident in your ability to identify and address potential roofing issues.
Safety Equipment Checklist
A thorough safety equipment checklist is essential for anyone starting on a roof inspection. First, invest in quality safety harnesses; they’ll keep you secure as you navigate sloped surfaces. Make sure your harness fits properly and is adjusted before you climb.
Next, don’t forget protective eyewear to shield your eyes from debris and harmful UV rays. A hard hat is also vital to protect your head from potential falls or falling objects. Sturdy, non-slip footwear will enhance your grip and stability on the roof.
Finally, bring a reliable pair of gloves to protect your hands while handling tools. By equipping yourself with these essentials, you’ll belong to a community that prioritizes safety and professionalism in every inspection endeavor.
Key Areas to Inspect for Leaks
Have you ever wondered where the most common leaks occur in your roof? Identifying these key areas can save you from extensive damage down the line.
Different roof materials may react differently to weather impact, making it essential to know where to look.
Here are three critical areas to inspect for leaks:
Flashing: Check around chimneys, vents, and skylights. Damaged or improperly sealed flashing is a frequent culprit for leaks.
Shingles: Look for missing, cracked, or curled shingles. These can compromise the roof’s integrity, especially after severe weather.
Gutters and Downspouts: Verify these are clear of debris. Blocked gutters can lead to water pooling, resulting in leaks beneath shingles.
Signs of Water Damage on Your Roof
As you inspect your roof this spring, keep an eye out for stains on your ceiling, which can signal water intrusion.
Look for signs of mold growth in areas that remain damp, indicating prolonged moisture exposure.
Additionally, check the flashing around chimneys and vents; damaged or missing flashing can lead to serious leaks.
Stains on Ceiling
When noticing stains on your ceiling, it’s essential to recognize them as potential indicators of water damage from your roof.
These ceiling discolorations often signal underlying issues that require immediate attention. Ignoring them can lead to more severe problems down the road.
To ensure effective moisture detection, keep an eye out for:
- Color Variations: Yellow or brown spots may indicate prolonged moisture exposure.
- Texture Changes: Bubbling or peeling paint suggests that water has infiltrated your ceiling.
- Size and Shape: Expanding stains can reveal worsening leaks.
Mold Growth Signs
Mold growth is a vital sign of water damage on your roof that demands immediate attention. If you notice dark spots or patches, especially in humid areas, it’s likely an indication of moisture infiltration.
To combat this, you should implement effective mold-prevention strategies, such as ensuring proper ventilation in your attic and keeping gutters free of debris. Regular inspections help identify moisture control techniques, like sealing leaks and repairing any damaged areas.
Additionally, consider using mold-resistant materials during roof repairs to further reduce the risk of growth. By staying proactive and vigilant, you can protect your home and ensure a safe environment for your family.
Don’t overlook these signs; addressing them promptly is vital to maintaining your roof’s integrity.
Damaged Flashing Areas
Water damage can manifest in various ways on your roof, and damaged flashing areas are often a telltale sign. Flashing serves as a barrier to keep water from penetrating vulnerable joints and seams.
When it’s compromised, you might notice:
- Cracks or gaps in the flashing material
- Rust or corrosion around metal flashing
- Water stains or mold growth on nearby surfaces
It’s essential to address these issues with timely flashing repair or regular flashing maintenance to prevent further damage.
Ignoring these signs can lead to more extensive roof problems and costly repairs down the line. By staying vigilant and proactive, you ensure your roof remains secure and your home protected from leaks.
Common Causes of Roof Leaks
Though a well-maintained roof can last for decades, various factors can still lead to leaks that compromise your home’s integrity. One common cause is worn-out or damaged shingles, which can allow water to seep through.
Additionally, improperly installed or deteriorating flashing around chimneys and vents is a frequent culprit behind leaks. Clogged gutters can also contribute, as they prevent water from draining properly, leading to overflow and potential roof damage.
Another issue arises from ice dams, which can form during winter months and cause water to back up under shingles. Finally, structural issues like sagging roofs may create low spots where water collects, increasing the likelihood of leaks.
Regular roof maintenance is crucial to identifying these vulnerabilities early and preventing common leaks from becoming major problems. By understanding these causes, you can take proactive steps to protect your home and ensure its longevity.
Steps to Take When You Find a Leak
When you discover a leak in your roof, it’s essential to act quickly to minimize damage and protect your home.
Start by identifying the source of the leak, which may require inspecting the roof from both inside and out. Once you locate the leak, implement temporary repairs to prevent further water intrusion.
Here are some steps to follow:
- Cover the area: Use a tarp or plastic sheeting to shield the leaking section until permanent repairs can be made.
- Seal minor leaks: Apply roofing tape or sealant to small cracks or holes to mitigate water damage temporarily.
- Inspect surrounding areas: Check for additional signs of leaks or potential vulnerabilities as part of your leak prevention strategy.
Taking these steps protects your home and contributes to long-term roof health.
When to Call a Professional Roofer
How do you know it’s time to bring in a professional roofer? If you notice persistent leaks despite your best efforts in leak detection, it’s essential to seek expert help. Ignoring water intrusion can lead to extensive damage and costly repairs.
In addition, if you observe significant wear on your roofing materials—such as curling, missing shingles, or rusted flashing—the expertise of a professional is invaluable.
When your roof is over 20 years old, or if you’re unsure about the condition of the materials, don’t hesitate to call in a roofer. They can assess structural integrity and recommend appropriate repairs or replacements.
Moreover, if you’re uncomfortable climbing onto your roof or lack the tools for a thorough inspection, a professional can provide peace of mind.
Frequently Asked Questions
How Often Should I Schedule Roof Inspections?
You should schedule roof inspections annually to ensure peak performance and longevity. Increasing inspection frequency after severe weather events helps catch potential issues early, keeping your home safe and maintaining your community’s aesthetic appeal.
Can I Perform an Inspection Safely on My Own?
Yes, you can perform an inspection safely on your own. Use proper safety precautions and reliable inspection tools to minimize risks and ensure thorough evaluations.
What Is the Average Cost of Roof Repairs?
Roof repair costs typically range from $300 to $1,500, depending on the damage and materials used. Average repair prices can vary considerably based on location and the contractor you choose, so always compare estimates.
Are There Any Warranties for Roof Inspections?
Yes, roof inspection warranties often exist, providing warranty coverage for specific repairs or maintenance. They typically cover defects found during inspections, ensuring you’re protected against unexpected issues, giving you peace of mind about your investment.
What Seasonal Factors Affect Roof Inspections?
Weather conditions dramatically influence roof inspections. Seasonal maintenance becomes essential; winter snow and ice can hide damage, while spring rains can reveal leaks. You must act promptly to ensure your roof’s integrity before summer storms arrive.
Conclusion
Regular roof inspections are essential for maintaining your home’s integrity. By staying proactive and addressing potential problems early, you can save yourself costly repairs down the line. Don’t underestimate the importance of these inspections—ensuring your roof is in top shape protects your investment and your family’s safety.